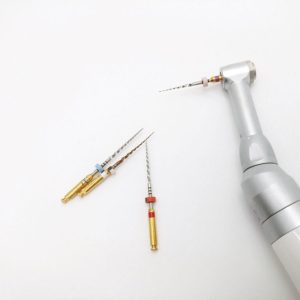
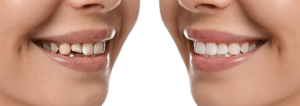
This is the denture production process
- Connect the mold (check the working model)
When receiving the dental mold, the master must first check the doctor’s requirements and whether the production conditions of the incoming mold are qualified, that is, whether the incoming mold is in good condition and whether the impression is clear. If you have any questions, please send them to the quality inspection department immediately. Put the inspected models in the qualified area, the to-be-judged area, the to-be-inspected area, and the unqualified area. Mark the tooth position that needs to be processed with a pencil to avoid the phenomenon of making the wrong product.
2. The repair of the working model
Use a dental laboratory arch model trimmer to trim the bottom and surrounding areas. The thickness of the trimmed bottom to the gum should be 0.9~1.2cm. Open the retention slot to increase the combination of the model and the base. Pay attention not to damage the abutment teeth and the corresponding opposing teeth, and to determine the occlusal relationship and the free ends that need to be done.

- Upper reset box
Fill the reset box with plaster and press the trimmed model in. A little gypsum can be filled in the retaining groove first and then pressed in. When it is slightly dry, brush off the excess plaster adhered to the reduction box and the abutment teeth. The distance from the surface of the reduction box to the entire gingival area should be about 6~8mm.
4. Trim the neck
First, the department master will distribute the goods according to the technical level of each employee. See clearly the position of the shoulder of the model abutment and the gum, and use a scalpel to gently scrape the abutment to ensure the accuracy of the gum edge and make the neck edge clear and smooth. Note: The gypsum nodules on the model should be removed first, and the shoulders and the gums should be identified and trimmed slightly. It is not allowed to scrape to the shoulders, otherwise, the neck margin will be too long. The contact surface of the adjacent teeth on both sides of the abutment can be cured by 0.1~0.2mm to restore the contact area of the crown well. The treatment of the bridge should be determined according to the fullness of the gingiva, and the curettage should be uniform.
Five, undercut processing (commonly known as a buckle)
Check whether the processed abutment is undercut. If there is, fill the plaster until it is vertical, until it reaches the same seating channel, and use a pencil to draw the tooth neckline to facilitate accurate edge trimming. Note: In general, plaster cannot be placed on the buccal shoulders of the labial and posterior teeth of the incisors, otherwise the fit will be reduced and the restoration effect will be affected.
- Separation model
Use a 0.2mm thin U-shaped plaster separation saw to cut downwards along the mesial and distal adjacent of the affected tooth (abutment) facing the gingiva and parallel to the long axis of the affected tooth (abutment). When sawing, pay attention that the model should not be too wet, so as not to stick to the saw blade, and the saw seam should be narrow. Do not injure the affected tooth (abutment) when cutting and keep the cut vertically. The sawing lines are parallel to each other on both sides.
7. Trimming
Use a mechanic grinder to hold a large ball drill within a range of 0.5mm and a width of 3mm from the drawn neck edge line for trimming, trim it into a concave surface, and then use a sharp instrument to trim the plaster from the free gingival area to expose the gingival sulcus. end. According to the shape of the neck edge shoulder and the requirements of different casting conditions, the neck edge of the die is appropriately extended to compensate for the shrinkage of the alloy. In this way, a clear neckline can be formed, which is convenient for the production of the neck edge shape of the wax-up. If the doctor does not prepare a shoulder table, the edge table of 0.3~0.35mm for porcelain teeth and about 0.3mm for steel teeth should be reserved, and the thickness should be uniform without serrated shape.
- Apply gap paint
First, apply a layer of hard mold water on the neck edge, and after a little drying, leave the neck edge about 0.5~1mm, and evenly apply one to two layers of gap paint from the neck edge to the joint surface. A smooth, complete, uniform gap coating is required across the entire crown surface. The purpose of coating the gap coating is to compensate for the hard-solid shrinkage during alloy casting, to ensure that the restoration can be smoothly seated after completion, and to reserve a certain gap for the cement.
9. adjust the bite
Check the occlusal relationship with the dental mold on the reset box. If there is occlusal wax to fix the occlusal relationship, you must first properly handle the occlusal wax and then fix the occlusion. It does not affect the occlusal relationship, check whether the retention force of the reset box is firm, and then fix the occlusion with the drip wax method.
- Maxillary frame
Connect the retained dental mold and the jaw frame with plaster. The plaster should be small and smooth, not upside down, and the midline should be aligned.
- Quality inspection and shipment
Each of the above processes is not allowed to wear and break the abutment. After completion, the head of the department will check whether it is made according to the design sheet, numbered, and checked for occlusion. At the same time, check whether the basket and dental mold are clean. After all meet the requirements, sign the letter and send it to the quality inspection department for inspection and then transfer it to the next department.


